
Worldwide shipping
Shipping & Returns
Quality assured
Find retail locations
Expert support
For All Your Questions
Fast and secure
For All Your Questions
Shipping & Returns
Find retail locations
For All Your Questions
For All Your Questions
In case we have not met, I’m Alexa Williams, Ask Alexa. I have worked here at Etelux for almost 15 years establishing great relationships with our customers and partners. Throughout my career at Etelux, I have had the pleasure of advocating for you, the customer, to make sure that you are taken care of. Most of the time, I am the friendly voice that answers the corporate phone line, so if we have not met in person, I’m sure we have talked. This form is to reach me directly, and I will respond as soon as I can. You can ask me anything, such as questions about our enclosures, help with which replacement parts to order, certification questions, etc…
Serving the Chinese scientific industry for over 15 years, discover how quality products, competitive pricing, and next day delivery allow us to achieve our mission “Enabling Technology for a Better World ".
Ultricies eu consectetur vitae donec scelerisque ante a ut morbi aptent tincidunt est non sagittis ut.


Shipping & Returns
Find retail locations
For orders above $100
For All Your Questions
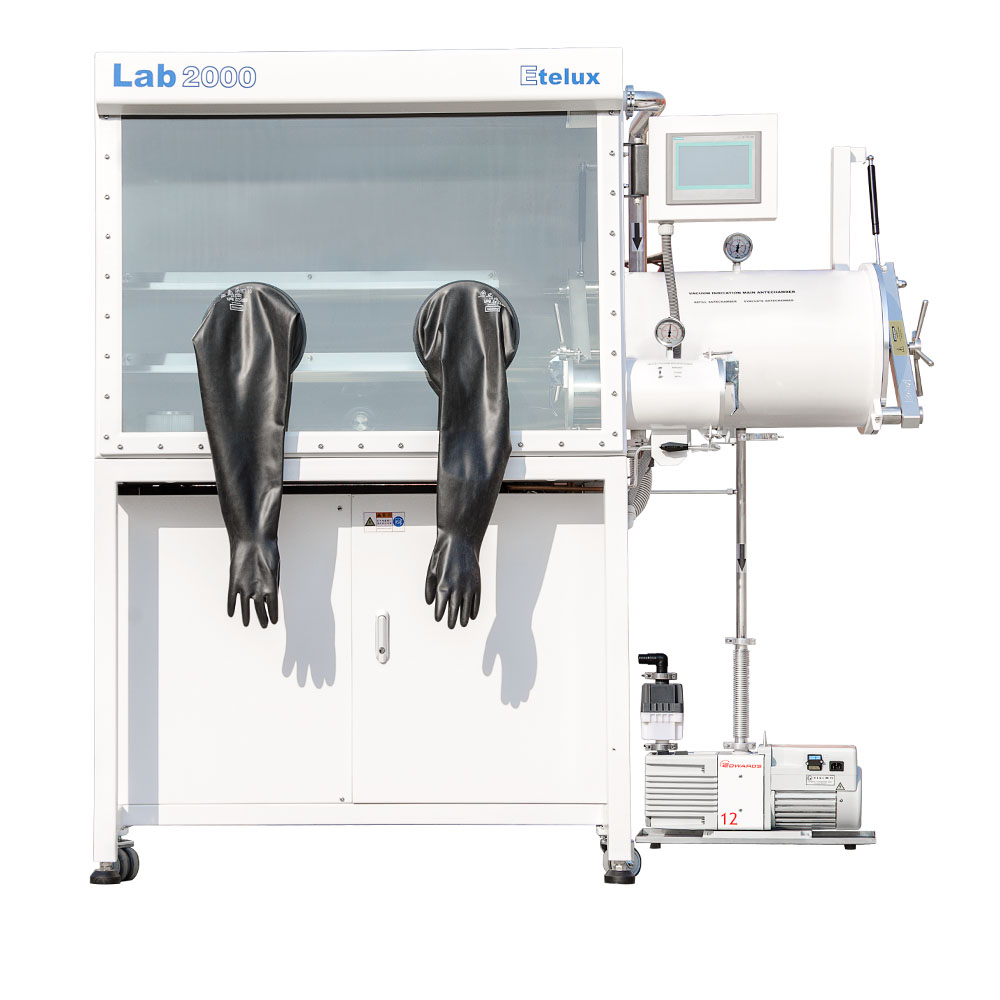
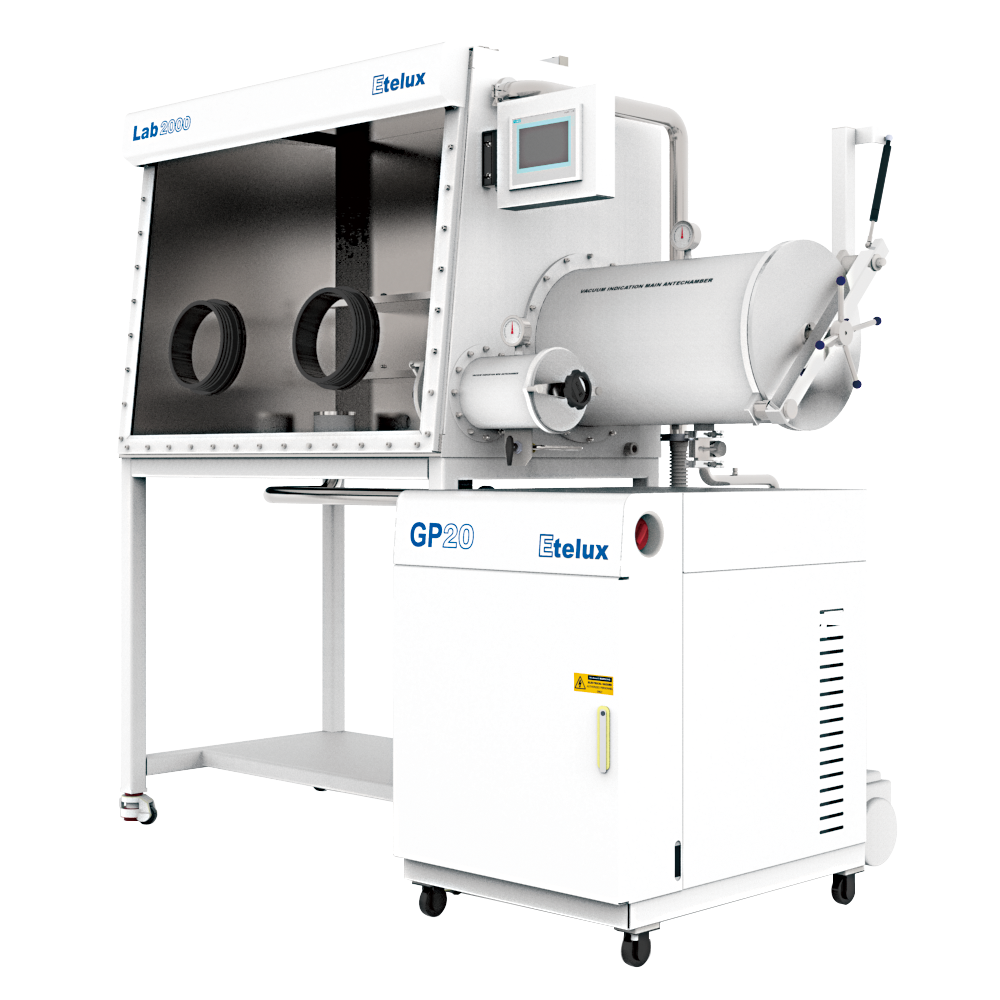
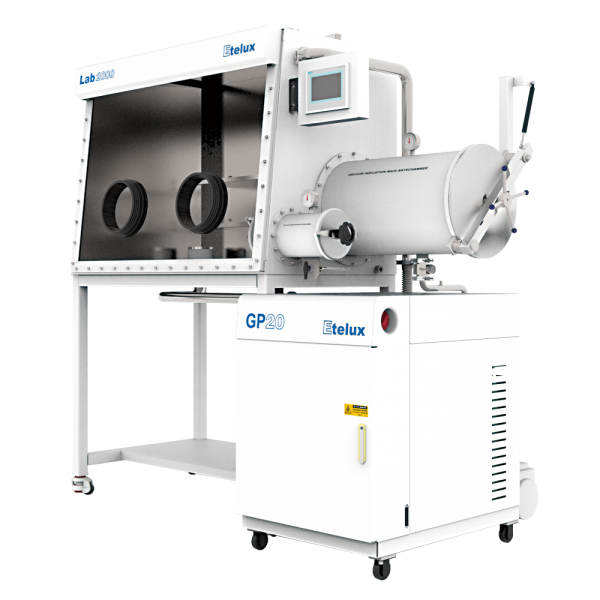
1. Glove box purging, regeneration and recycling operation steps
1, Purging steps. Stop the cycle→set the pressure of the pressure reducing valve to 0.2MPa→click the task selection, purging button→set time→confirm to start purging→automatically stop when the time is up.
2, regeneration steps. Stop the cycle → open the pressure reducing valve of the regeneration gas cylinder to 0.1MPa → click on regeneration → ventilate for 3 minutes to adjust the flowmeter to 2.5 cells → ventilate for three hours after 183 minutes, confirm the pressure of the pressure reducing valve is 0.1MPa, the flowmeter 2.5 cells → the total time is over After that, it will stop automatically (1203 minutes) → close the pressure reducing valve.
3. Cycle operation. Stop regeneration and purging → adjust the pressure of the working gas cylinder pressure reducing valve to 0.4MPa → click cycle (manual and automatic).
2. Air leakage at the cylinder
Some glove box cylinders use gas very quickly. It is very likely that the connection between the cylinder and the glove box is leaking. Detection method one, open the pressure reducing valve, and apply bubbles from the steel cylinder to the glove box, and the leak will continue to bubble; detection method two, open the pressure reducing valve to 0.4 Mpa, and close the pressure reduction after 5 minutes Make sure that the glove box is not filled with air. Observe whether the pressure reading of the pressure reducing valve decreases after one hour. If it decreases significantly, it means air leakage.
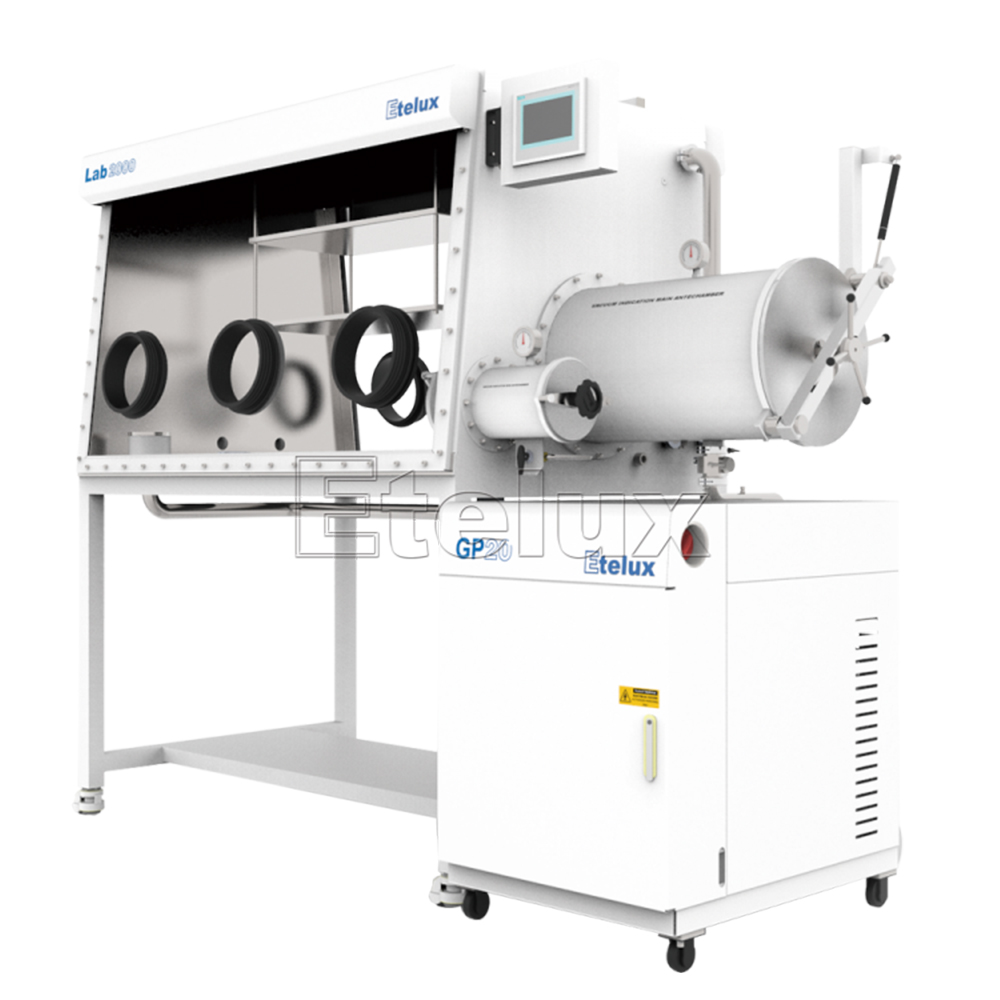
Third, the maintenance of the vacuum pump
1. Change the oil of the vacuum pump. The vacuum pump has a special vacuum pump oil, no other lubricating oil, and do not mix several vacuum pump oils. There is an oil level scale on the vacuum pump, and the oil level must be maintained between the scales. Generally speaking, when the oil level is close to the lowest mark, or the vacuum pump oil is already very turbid, consider changing the oil. When changing the oil, it is best to clean it with a small amount of oil first, and then add it to the 2/3 mark.
2. Reduce organic solvents to be pumped into the vacuum pump. When vacuuming the mini antechamber, try to use a solvent bottle with a threaded piston. When it contains a solvent with a low boiling point, it should be pumped slowly to low vacuum (-0.5bar) many times.
Fourth, the replacement of gloves
Butyl rubber gloves are easily cut by needles and broken glass, and the oxygen content is easy to rise when the gloves are broken. So always check whether the gloves are damaged.
There are three ways to change gloves: 1. Put on the gloves from the outside, use a nitrogen (argon) tube to blow between the two gloves for a period of time, then put the gloves on the outside and take out the inside gloves from the mini antechamber. 2. Take the gloves into the glove box from the mini antechamber, put the new gloves into the aluminum alloy glove opening from the inside, and take out the outer gloves. 3. Glove changing device to ensure safe and leak-free replacement of gloves.
Five, leak detection
Method 1: Enable manual leak rate detection. Select task→leak rate detection→manual detection→confirm. The leakage rate of advanced glove box is ≤0.001%.
Method two, stop the circulating fan and adjust the tank pressure to 8mbar. After about 10 minutes, the tank pressure is basically stable. Observe the rising value of oxygen content. If the oxygen rise in half an hour is greater than 5ppm, it means that the leakage rate is too high (the upper body oxygen amount of the advanced glove box is less than 1ppm in half an hour). If you find that the oxygen content rises faster, it means there is a leak.
Six, be careful about the type of solvent
Which solvents can not be placed in the glove box: Generally speaking, volatile organic solvents will damage the analyzer and the catalyst. Among them, acid solvents and halogen-containing volatile organic solvents are the most damaging to the glove box.
No account yet?
Create an Account