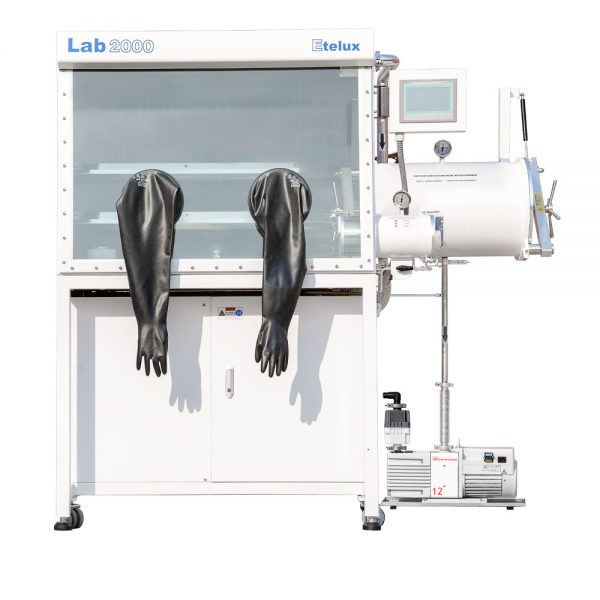
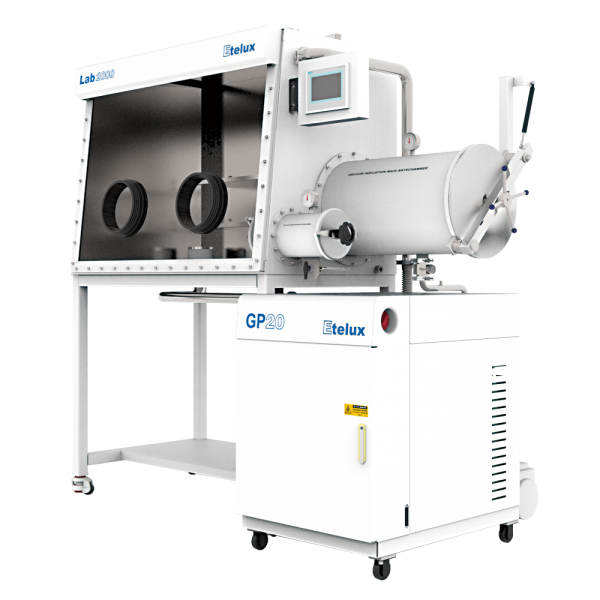


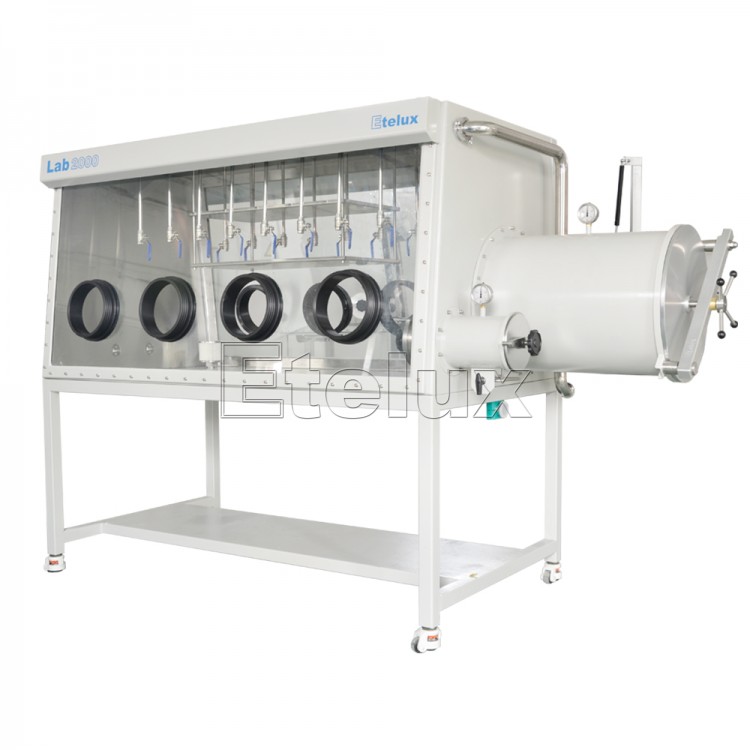
The glove box is a laboratory equipment that fills the box with high-purity inert gas and circulates and filters out the active substances (such as H2O, O2 and other gases). Also called vacuum glove box, inert gas protection box, etc.
1. Open preparation
1) Check the antechamber doors (inside and outside) to ensure that it is airtight.
2) Check the air valves (4 antechamber air valves (commonly used), 4 activated carbon replacement air valves (not commonly used)) to ensure that they are closed.
3) Connect the gas circuit (working gas, regeneration gas).
4) The water chiller needs to be checked. The water pipe and circulating water volume should be between “max” and “min”. If the water level is low, the upper cover should be opened and an appropriate amount of deionized water should be added to make the water level reach the standard.
5) The circuit plug, the purification system and the cooling water circulation machine (small), are connected to the socket, and the vacuum pump power supply is connected to the purifier.
2. Ventilation Open the main valve of the high-purity nitrogen cylinder and adjust the gauge pressure of the auxiliary gauge to about 0.5 MPa through the pressure reducing valve.
Note: When the gas in the cylinder is insufficient, replace with new gas in time. When shutting down and replacing, first remove the decompression gauge and install it on a new cylinder; if you ventilate during normal use, you should first ensure that the cycle is closed (the “cycle” on the display is not lit), and then click “set” Adjust the upper and lower limits of the pressure to ensure the positive pressure of the cabinet (1~3 mabr), and then replace it.
3. Water cycle
1) Click “power” on the cooling water circulation machine to turn on the cooling water circulation machine,
2) Set the water temperature, usually set the water temperature to about 20 oC, click “cool” to turn on the cooling,
3) Click “pump” and the pressure gauge has a certain water pressure, indicating that the cooling water circulation is on. Note: Check the water level on the water level gauge regularly. It should be between “max” and “min”. If the water level is low, you should open the upper cover and add an appropriate amount of deionized water to make the water level reach the standard.
4. Turn on the machine. Turn the Main Switch on the purifier to “1”, wait for a while, the display on the purifier will light up and the machine will be turned on.
5. Air circulation (except for water and oxygen) Click on “Circulation” on the display to turn it on, then click on “Set” to jump to the pressure setting interface, set the upper limit pressure to 3 mbar, and the lower limit pressure to 0 mbar and click “OK” “, click “Return”. Note: During the air circulation process, the circulation fan must work. (Can be judged by listening to the sound)
6. Vacuum pump Since the vacuum pump power is supplied by the purifier, the power switch (side) of the vacuum pump can be kept on (“0” and “—” switches are adjusted to “—”). The vacuum pump will automatically turn on intermittently during the cycle, and each time it is turned on, if you do not need to operate the glove box, you can click the button to turn off the vacuum pump on the touch screen. When the gear knob (upper part) of the vacuum pump is working normally, just adjust the “0” gear. The “I” and “II” gears are the air shock water removal gears. When air shock water removal is required (long time work and After finishing “regeneration”), adjust the gear to the air shock mode, generally use the “II” gear, air shock for 15 minutes (because the working time of the pump is specified as 5 minutes, therefore, it needs to be artificially displayed on the display screen after 5 minutes of air shock Click “Vacuum Pump” to start the gas shock again, and finally reach the requirement of 15 minutes).
7. Click “Analyze” on the display of the (water and oxygen) analyzer to display water and oxygen content. If it displays “###### ppm”, it means that the range is exceeded. At this time, click “Analyze” again to close, make sure The oxygen analyzer is not exposed to high oxygen content for a long time and is powered on to ensure extended service life. Make sure that the cycle is turned on to remove water and oxygen, and regularly open the water and oxygen analysis to check the water oxygen content. Only when the water and oxygen content is less than 0.1 ppm can it meet the environmental requirements of high-purity inert gas protection.
8. Illumination Click “illumination” on the display to turn on the lighting inside the cabinet, click again to turn off.
9. Cleaning When the cycle is turned on for a long time and the water and oxygen content still cannot meet the standard, the gas in the box should be cleaned and replaced.
1) Close “Cycle”, click “Set”, set the upper pressure 7 mbar, press Enter, press 4 mbar, press Enter, and then click “OK”, then click “Return” to return to the main interface, click ” Vacuum pump” to the on state, click “clean”, set the time within 20 minutes, click start, the equipment will automatically clean. After cleaning, click “Return” to complete cleaning.
2) Adjust the air pressure, click “Set”, press 3 mbar up, 0 mbar down, click “OK”, click “Return”, click “Cycle” to turn it on.
10. Regeneration
1) Before regeneration, pay attention to connecting the regeneration gas and ensure that the air pressure in the cylinder is at least 10 MPa.
2) Turn off “Circulation”, “Vacuum Pump” and “Analyzer”.
3) Click “Set” to set the upper pressure to 3 mbar and the lower pressure to 1 mbar, click “OK” to complete the pressure setting.
4) Click “Regeneration”, then turn on the regeneration gas, adjust the gas flow through the pressure reducing valve on the cylinder, and observe the flow meter on the purification cabinet. It should be between 15-25 L/min (flow adjustment should be completed within 2 minutes) , Otherwise the regeneration should be turned off and readjusted). After adjustment (after 2 minutes), the system will automatically heat for 3 hours, then automatically ventilate the regeneration gas for 2.5 hours, and then automatically cool down for 10.5 hours. After the above process is over (16 h), wait another 2 h to ensure that the temperature is completely restored to room temperature before turning it on again.
Note: After regeneration is complete, turn on the vacuum pump and set the current position to the “II” position after turning on the machine, and air shock for 15 minutes.
11. Use of transition cabin
1) The use of small transition compartment When the gauge pressure of the transition compartment is “0”, the outer compartment door can be opened and items can be placed (the items should be placed as far as possible to facilitate access from the inside). After placing the items, close the outer compartment door tightly and ventilate the transition compartment, requiring “three pumps and three supplements” (the same as the use of the three links) to exhaust the air in the compartment. After ventilating, make the gauge pressure of the transition compartment “0”, then open the inner compartment door with gloves, take out the items, and close the inner compartment door tightly.
2) The use of the large transition compartment The use of the large transition compartment and the small transition compartment is basically the same, except that the exhaust valves of the small transition compartment are assembled on the same valve, while the large transition compartment has two valves. Note: The two valves of the large transition chamber must not be open at the same time, otherwise the vacuum pump will directly pump air into the glove box. When pumping and ventilating, first open the exhaust valve (the black knob under the cabin, turn 90 degrees counterclockwise to vertical), and when the gauge pressure approaches -1.0 MPa, close the exhaust valve (turn 90 degrees clockwise to reset);
Open the intake valve (blue knob, rotate 90 degrees counterclockwise horizontally) to take in. When the gauge pressure is “0”, close the intake valve (turn 90 degrees clockwise to reset) to complete an air extraction operation;
Same as above, repeat the operation twice. Other operations are the same as the small transition cabin.
Note: 1. The large transition chamber has a larger volume and is more gas-consuming. Therefore, if the volume of the article permits, try to use a small transition chamber to save high-purity nitrogen;
2. When the transition compartment is not in use, it is best to ensure the negative pressure in the compartment to reduce the possibility of air leakage due to the unclosed door.
12. Foot switch When using gloves, you can properly step on the pressure or decompression to adjust the wearing comfort, and the cabinet pressure will change between the upper and lower limits of the set air pressure.
13. Replacement of activated carbon. Activated carbon is used to adsorb organic solvents in the box. After long-term use, the adsorption capacity will decrease. At this time, it should be replaced. According to the amount of solvent, the replacement period is six months to one year.
1) Adjust the air valves in the purification cabinet (the three valves in the cabinet can be seen from the opening at the rear of the purification cabinet) to adjust them from vertical to horizontal.
2) Open the upper and lower doors of the activated carbon storage tank, release the activated carbon in the storage tank, close the lower door, add new 8kg activated carbon from the upper door, and close the upper door.
3) The same as the use of the small crossing cabin, the gas in the activated carbon storage tank is “three pumps and three supplements”. The ventilation valve is behind the purification cabinet.
4) Reset the gas valve in the purification cabinet to complete the replacement of activated carbon.


